There’s more to creating an audio CD than simply clicking the Copy button. We slip in a few discs and go for the burn…
Creating an audio CD can be as simple or as involved as you want to make it. With most CD-R software you drag audio files into a playlist, click the burn button, go have a cup of coffee and come back to an audio CD. And that’s fine. However, there’s more to creating an audio CD than that.
Brought to Book
When the CD format was being developed, it was seen as the answer to many problems involving data storage, each with their own requirements. Consequently, there emerged a rather long list of CD formats named ‘Books’ to cater for each requirement.
This is a much-abridged and précis’d list:
- Red. This is the standard audio CD, recorded at 44.1kHz and 16-bit resolution.
- Yellow. A general format for storing computer data and for multimedia use for playing audio and video from the CD.
- Blue. Enhanced CD, also known as CD Extra, comprises audio and data sections allowing the CD to be played by an audio player and in a computer.
- White. Essentially Video CD.

- Orange. Defines the recordable CD format comprising CD-R, CD-RW and CD-MO with multisession capability.
The main Book of interest to musicians is the Red Book. Although other formats can be created by general-purpose CD-R software, you really need dedicated audio CD software to take advantage of the special audio CD features.

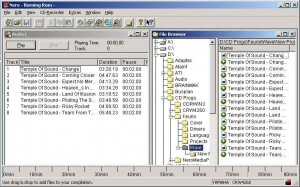
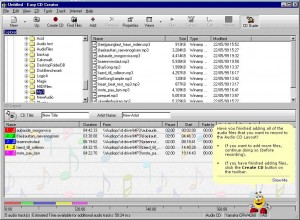
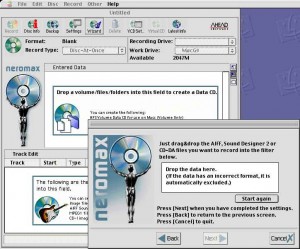
The two most popular bundled pieces of software are Adaptec’s Easy CD Creator and Ahead’s Nero and these are very easy to use, essentially requiring little more than dragging audio files and dropping them into a playlist.
All at once
There are two ways a CD can be burned – disc at once (DAO) and track at once (TAO). As the names suggest, DAO burns the entire disc in once go whereas with TAO the disc is burned a track at a time.


Tech terms
Run-in/Run-out blocks
Small pieces of data written at the start and end of each track when using TAO mode writing.
Frame
The smallest unit of data a CD drive can access, comprising 24 data bytes, subcode and error correction.
CD-R
CD-Recordable. Can only be written to once.
CD-RW
CD-ReWritable, able to be written to and erased many times.
In addition, features such as changing the gap between tracks require DAO writing.
The bottom line is simply to use only DAO when creating audio CDs. This is not a problem with modern CD-R drives but some older drives may not support DAO writing.
Good sessions
When CDs were first launched, one heavily-promoted advantage was their massive storage capacity. However, not many people created 650Mb of data in one go so multisession writing was devised allowing you to fill up a CD bit by bit by writing to it in several sessions. This multisession capability was probably most used with photo CDs when people were encouraged to put their photos on CD in several goes and then take them along to the chemist for printing.
A CD-R must be multisession-compatible in order to read a multisession CD – all modern ones are – but, again, this is not recommended for creating audio CDs.
Write again

However, the reflectivity from CD-RW is not as great so standard CD players, including some computer-based CD drives, may not be able to read them – drives need to be CD-RW compatible to do so.
It’s also unlikely that audio CD players will be able to read them. Needless to say, you need a CD-RW drive in order to write them.
CD-RW was useful when blank CDs cost a fiver but now that they only cost a few pence it’s not such a big deal if you waste a few.
Your disc runneth under
The most feared error in CD burning is ‘buffer underrun’. The writing process takes place in real time and the CD-R’s buffer must always contain data to feed the laser. If the buffer empties the CD becomes a drinks mat. The likelihood of a buffer underrun error increases as writing speeds increase. Large buffers, therefore, are a Good Thing.
In 1999 a new technology surfaced called Burn Proof which supposedly stands for Buffer Under RuN error Proof although it’s a neat name anyway and it’s been trademarked by Sanyo. It’s a function of the hardware and firmware in the CD-R/RW drive and it essentially puts the burning process into pause if the buffer empties during a burn without damaging the CD. Truly an excellent idea.
You do need a Burn Proof drive to use this. Most modern drives tend to include the technology and most software supports Burn Proof, too.
Give me more


The overburning process requires that the CD-R be physically able to overburn and the CD-R software must support it, too. It’s often a good idea to limit the write speed to 2x or 4x at least until you discover what your system – CD-R and CD – are capable of.
The main problem with oversized CDs, assuming you can burn them in the first place, is that they may not be recognised by many playback systems. In fact, with any home-burned CD you run the risk of it not playing in a car multi-CD changer for example, and this risk increases the more a CD is overburned. However, there are so many variables involved that you need to try it see what the resulting CDs play on.
Most people used overburning in order to, er, duplicate commercial CDs that were longer than normal. If you keep your demands modest, such as overburning a R74 to 76 minutes, there’s a greater likelihood they will play on other systems.
Code breaker
If you’ve delved into some of the more detailed CD-R software you’ll have noticed a range of codes and parameters that you can set and change:
- ISRC. The International Standard Recording Code enables information about the country of origin, year of issue and serial number to be burned to the CD. It is generally only used on commercial recordings.
- UPC. The Universal Product Code is a 13-digit catalogue number, again, mainly used on commercial recordings.
- Subcodes. This is where it gets interesting. There are eight subcode channels on each CD labelled P to W. Channels R to W are used for CD graphics while P and Q store information such as track start and sub-index information.
Mind your Ps & Qs
As PQ subcodes determine track times, you can change these times by changing the codes. The P channel indicates the start and end times of each track, while the Q channel provides timecode addresses. It also stores the state of the Protect or Lock flag which prevents the CD being digitally copied, and the Emphasis flag. Emphasis is a basic noise-reduction process but it’s rarely used.

There is a host of rules about PQ codes such as having silent frames before each track, and sub-indexes should be early but most software that lets you adjust these settings does so in a friendly manner. Multi-purpose CD-R software doesn’t usually let you get this far down and dirty which is why specialist audio software such as Sonic Foundry’s CD Architect and Steinberg’s WaveLab is a must for creating customised audio CDs.

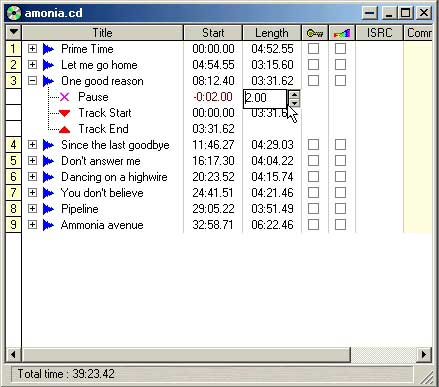
You can also record a ‘live’ session or join audio tracks together so they play continuously but insert track start positions in the data so you can skip to any of the songs. This is where dedicated software comes to the fore. With CD Architect, for example, you can crossfade between tracks – very professional!
Index linked
CDs can hold a maximum of 99 tracks. However, each track can be further marked with up to 99 index points. Again, with suitable software, you can drop an index into a track at any position.
Indices were first widely used by sample CD creators who would stuff 1000 samples onto one CD in 99 tracks, each track typically having 10 index points to make it easy to find individual samples. Another oft-touted use is in classical music to point out different sections in a piece.
Not all CD players recognise index points, however, and sometimes the hassle of using indices is more than it’s worth. For whatever reason, indices are not in common use but it’s nice to know that they’re there should you need them.
You can quickly create audio CDs with ‘ready-to-burn’ software but a little knowledge of the audio CD format and how audio tracks are assembled on a CD will allow you to create highly-customised CDs.
For more info…
There’s more information about audio CDs and CD formats on the Web than you want to know. Here’s an illustrated and animated guide to How CD writers work:
http://computer.howstuffworks.com/cd-burner.htm


