Last Updated on October 8, 2016 by Andrew Culture
If it’s near Christmas, you might want to read this first.
This Tutorial was written using Steinberg’s Cubasis VST, the forerunner of Cubase SE 3. However, you can use any sequencer. The screen shots may be slightly different but the principles are the same.
General Information
Building up a song from small parts is the fun part of sequencing. Cubase and virtually all other sequencers can colour-code the parts. Use this to make it easy to identify the sections; it’s so easy to get lost with lots of parts on the screen.
Use copy a lot – it’s one way to get a lot of music from relatively little effort. Your best friends are your ears so treat them kindly and, er, listen to what they’re telling you about the song.
Remember – nothing is ever permanent in a sequencer. Every section can be edited and rearranged so nothing is set in stone until you decide the song is complete.
Step 1

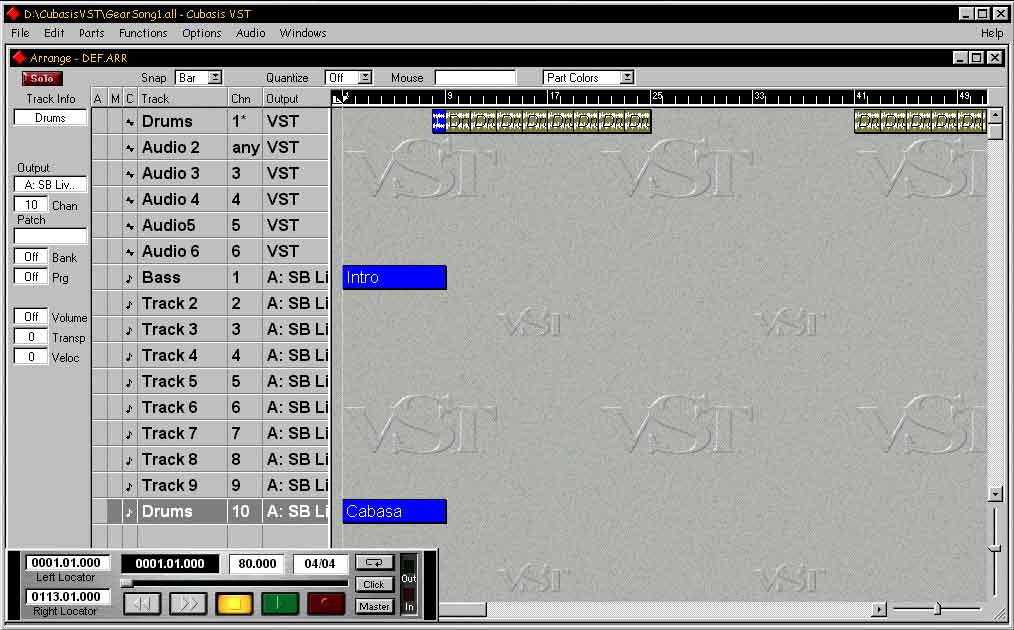
You need a structure. Honest. Let’s have a snappy eight-bar intro leading into the verse, and as the verse is pretty weak we’ll run straight on into the chorus then back to the verse, into the middle 8 which is where the guitarist widdles for a few bars, and then we’ll finish by repeating the chorus ad nauseam.
As the drums are going to thud through the whole of the song, we’ll create an intro from a MIDI bass line and a cabasa played on the MIDI drum set- a nice Latin-make-you-wanna-move-your-ass type sound. We’ll build the drum track using a two-bar drum sample and we’ll lead into the verse with a one bar drum fill.
So we’ve 16 bars for the verse, 16 for the chorus, 16 for the verse, eight for the middle 8, and as many 16-bar choruses as we can stomach.
Step 2

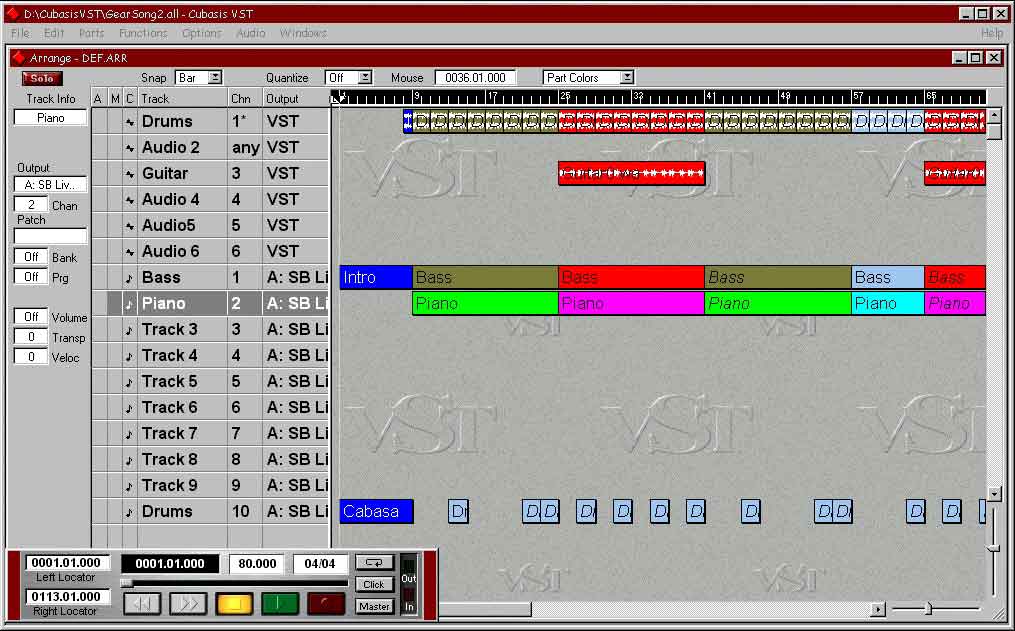
We can’t repeat the same drum sample throughout the entire song – bores R us – so we’ll use a slightly busier drum sample for the chorus and throw in a few “humanising” additions such as a hi hat here and there and, because the piece has a Latin feel – as heralded by the intro – a tambourine and agogos from the MIDI drum set.
Now we add the bass line. We can record one part each for the verse, the chorus and middle 8 and copy them as required.
We’ll add a cool, funky Latin guitar part during the chorus. If your brother plays a mean guitar, record him. If not, use a guitar sample.
Sounds like it needs a piano so you’re glad you bought the MIDI keyboard. Play simple lines during the verse and busier, more heavily rhythmic lines during the chorus. It doesn’t matter what you play during the middle 8 – you won’t be heard over the guitarist.
Step 3

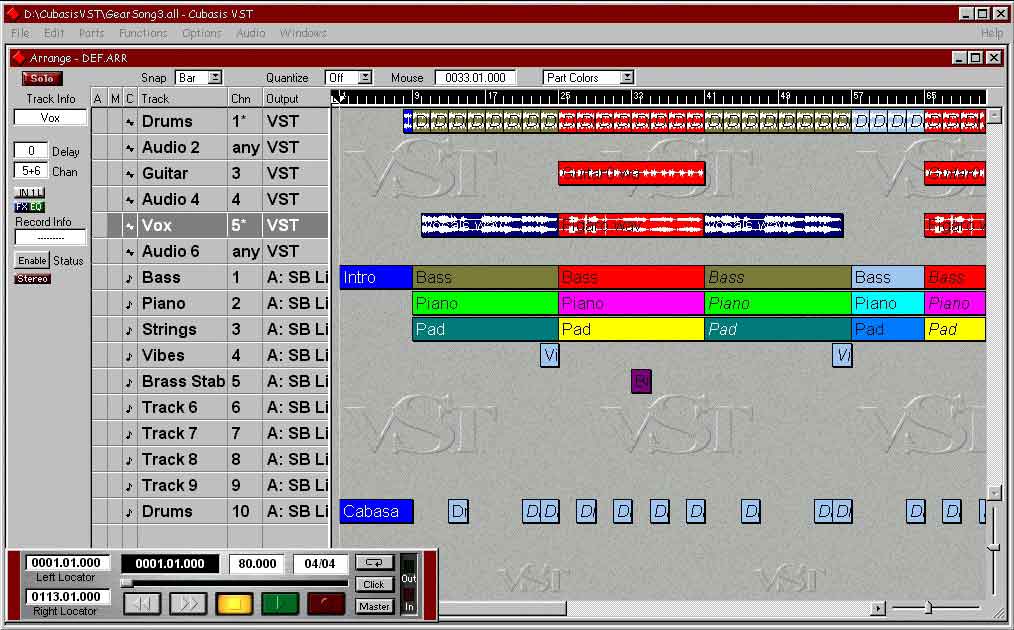
Add a pad using strings or some suitably synthy, sustaining sound. Use MIDI for this. Again, record once, copy many times. You should be getting the hang of this by now.
Two more things to add which we can do with MIDI. There’s a cute vibes arpeggio at the end of each verse and a sexy brass stab in the middle of the chorus.
Time to add the vocals so give the singer a bottle of lubricant – 3-in-1 is not recommended. Tell everyone else to shut up or send them to the pub, and prepare for a long session.
You’ll get better spontaneity if you can record the vocals in one go from start to end. This rarely happens so settle for recording in sections, the verse and the chorus. It will help to record the final chorus sections in one go but again, hey that’s what computers are for – stitching together the poor performances of so-so singers.
Step 4

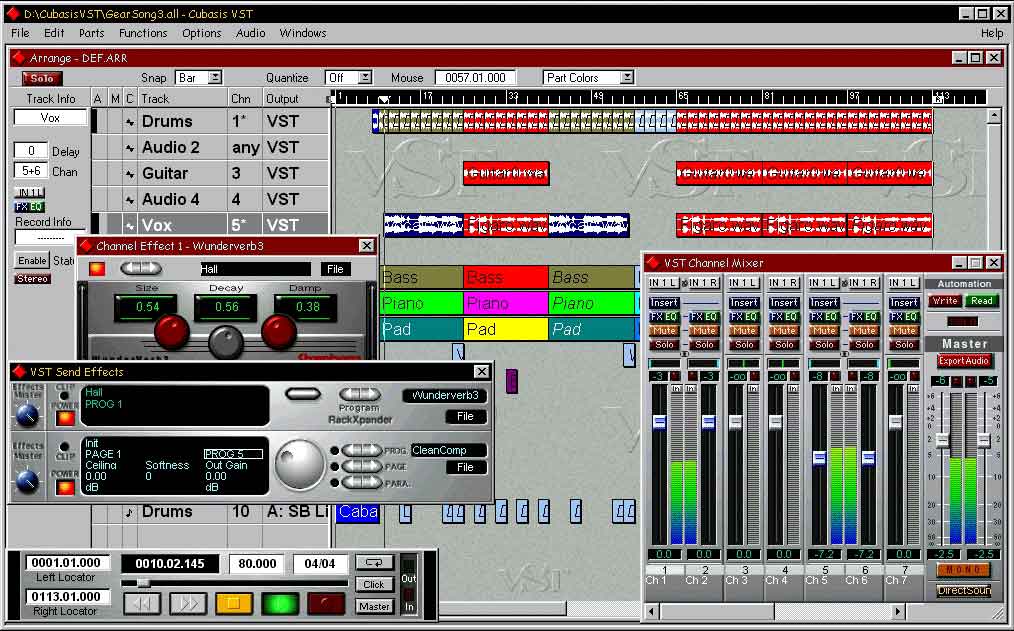
The next stage is to mix and balance the parts. Like most sequencers, Cubase has built-in digital audio effects so add some reverb to the vocals so they don’t sound as if they were recorded in a broom cupboard – even if they were. If the vocals are thin, add some chorus – but don’t tell the vocalist. You’ll also want to add a smattering of compression to the guitar to even out the volume.
While doing all this, you need to mix and balance the sounds and Cubase has a mixer for the purpose. It’s actually an audio mixer so it only mixes the audio tracks but the MIDI parts are easy to balance from the main screen. You then record the MIDI parts into spare audio tracks, one at a time please, and save everything to a stereo audio file ready for burning to CD.
And may the Lord have mercy on the charts!


