Contents
Fades and crossfades are an essential part of audio editing. We explain how to cross your fades when you come to them…
There’s more to a good fade than meets the eye. Or ear. Fades are used at both the macro (recording) and micro (sample) levels and we’ll look at the considerations involved when working at both these levels in this feature.
First, let’s get some terminology out of the way. A ‘fade’ is a gradual increase or decrease in volume. In recording, it is most commonly used to fade out a song. In fact, fade-out endings for songs have become almost de rigour giving rise to the premise that songwriters are no longer able to write endings.
Tech terms
Butt Splice
This is the alternative to a crossfade where two pieces of audio are simply stuck next to each other. This was a typical join in the days of tape recording but with modern software, there’s no excuse for sloppy butting.
Transition
The movement from one state to another is typically used to describe a crossfade and sometimes used as a verb by nerds who know no better – crossfades make one song transition into another.
Glitch
A click or some other disruption in the playback. Audio edits such as loop-making can easily create a glitch if there’s a difference between the amplitudes of two sections of audio that are joined together.
The fade out has not always been a songwriting device. Paul Anka’s chart-topping Diana back in 1957 was widely claimed to be the first pop song to use a fade but we reckon it wasn’t and there are several earlier fade-outs including The Charms’ Hearts of Stone from 1954.
Fade away
Anyway, if you want to do a fade, do it right. Decide if you want a short fade or a long fade and make sure there is enough material for the fade. With modern sequencers it’s easy to copy the chorus or the last few phrases to the end of the song, giving you plenty of material to work with.
The most intuitive way to fade is to use the faders on a mixer, either of the hardware or software variety. All modern software sequencers will record your movements so you can fade, tweak and edit until you get it just right.
There is usually an optimum point for the fade to actually fade to nothing. You’ll hear this instinctively if you listen to fade-outs. In most cases, it’s at the end of the chorus or phrase. In other words, the song ends at a natural endpoint. This isn’t always the case but it’s a good place to start – or end! – when creating your own fades.
Curvy wurvy
The alternative to performing a manual mix is to create a master audio file of the song and either apply an editor’s fade function or draw a fade onto it with a volume envelope, again both standard fare in modern sequencers and audio editors.
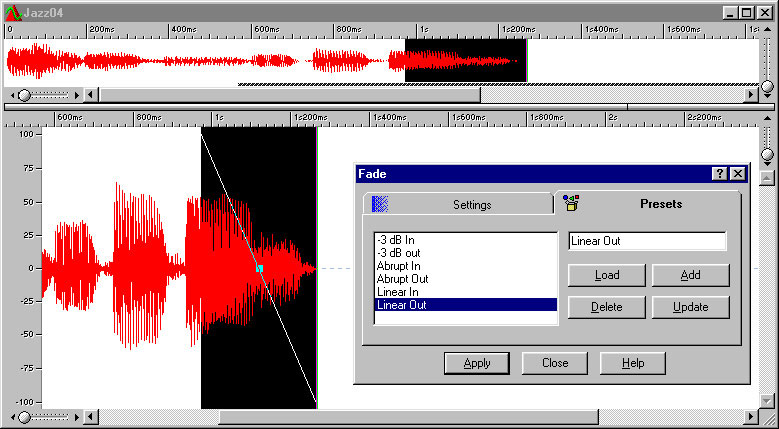
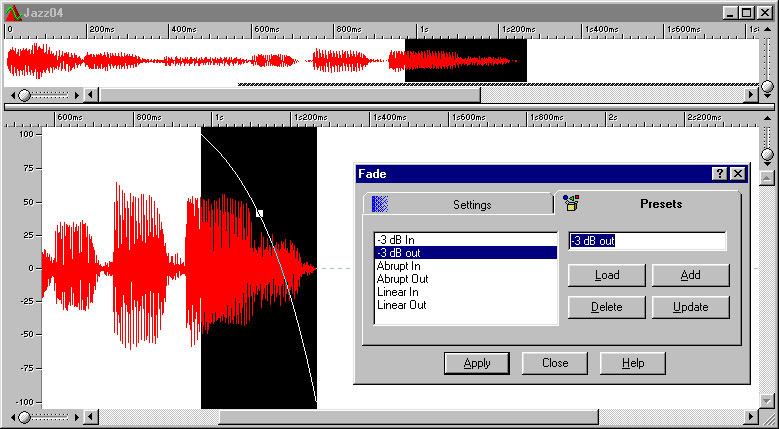
Fade functions often give you a choice of fade curves. The two most common types are linear and logarithmic. Linear fades are simply straight lines whereas logarithmic fades are curved. Our ears respond to volume in a logarithmic way so log fades may seem to be the most natural. In many cases they are but don’t dismiss a linear curve until you’ve tried it. Sound, music and mixing are still as much art as science.
Drawing in a curve gives you more control although it can be easy to get carried away if you stray too far from a linear fade, and log fades are not easy to draw by hand. But drawing is useful if you don’t want to fade in a regular manner.

The reason why manual mixing often produces the best fades is that we mix what we hear so considerations about linear and log curves don’t come into the equation. Also, you might not fade in a regular way. For example, on each repeat, you may decide not to fade the start of the chorus very much but then fade faster halfway through. This may be easier to do manually than by drawing. Whatever method you decide to use, some experimentation will undoubtedly be necessary.
Not fade away
Considerably less popular with songwriters and producers than the fade-out is the fade-in. However, this very fact can be used to make a song a little different. Fade-ins work exactly like fade-outs – but in reverse of course. In most cases, it’s a good idea to keep a fade-in short unless you’re after a particular effect. The fade function in a sequencer or audio editor can often be used here very quickly and effectively.
Crossfades

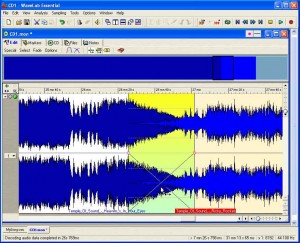
In recording, this is primarily used to make one track on an album fade or merge into the following one. When done successfully, it’s a great effect.
As with fades, you can perform a crossfade manually. You need mixed versions of the two songs routed to two different sets of faders. The two songs must be on different tracks and the end of the first song must overlap the start of the second. As with fades, make sure there is enough overlapping material for the length of the crossfade you want to do.
Ways to fade

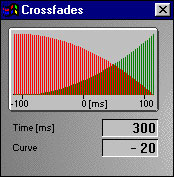
Performing a crossfade is a little more involved than doing a fade so it’s worth looking at the help you can get from your sequencer or audio editor. Most have a crossfade function and, again, some offer a choice of curve. You may also be able to use one curve for the fade out and a different one for the fade in.
Loopmasters
The principles of crossfading are nowhere more essential than in sample and loop editing and creation. Being able to crossfade well is the mark of a polished loop maker. Whereas our ears can be quite forgiving if two songs are crossfaded in a slipshod way, if you don’t get the crossfade in a loop or sample right there will be a very noticeable click.

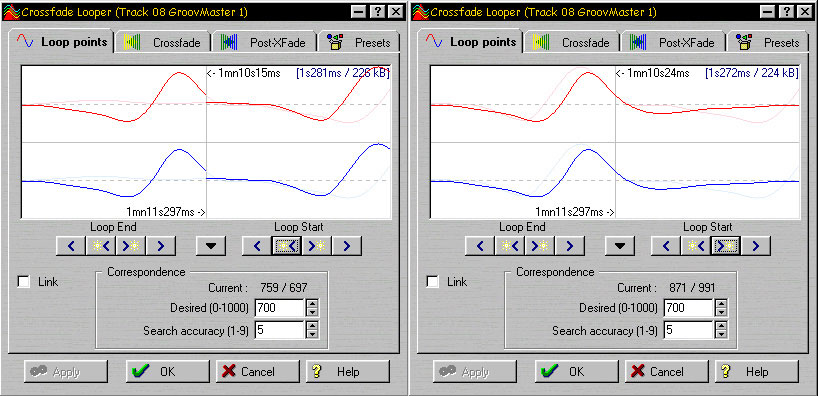
Software can help, of course, and you’d be ill advised to try looping without some soft assistance. There are a few wizened loopers who profess to do it by touch and sense of smell but why make life difficult?
Level crossings
The secret of a good loop is to find zero-crossing points in the sample. If you use an audio editor to zoom in closely on a waveform you will see it as a wavy line that oscillates above and below a central horizontal line.

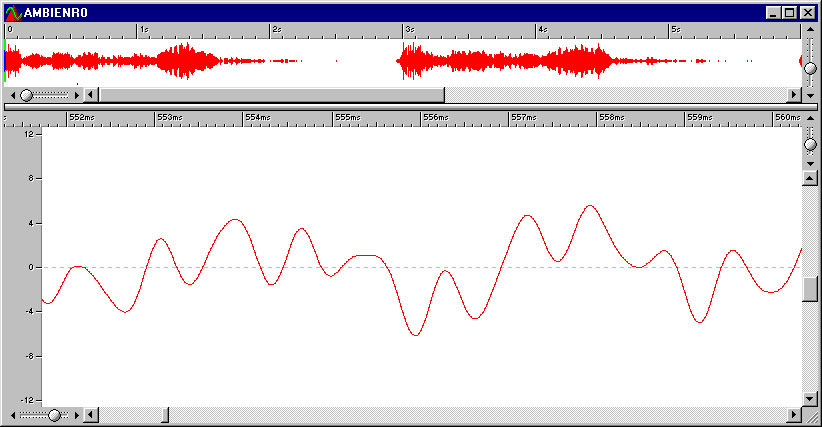
When the waveform is on the horizontal line it is at zero volume and these are the places where you should cut the sample. Most audio editors have a function that automatically cuts the audio at zero-crossing points to help make seamless joins.

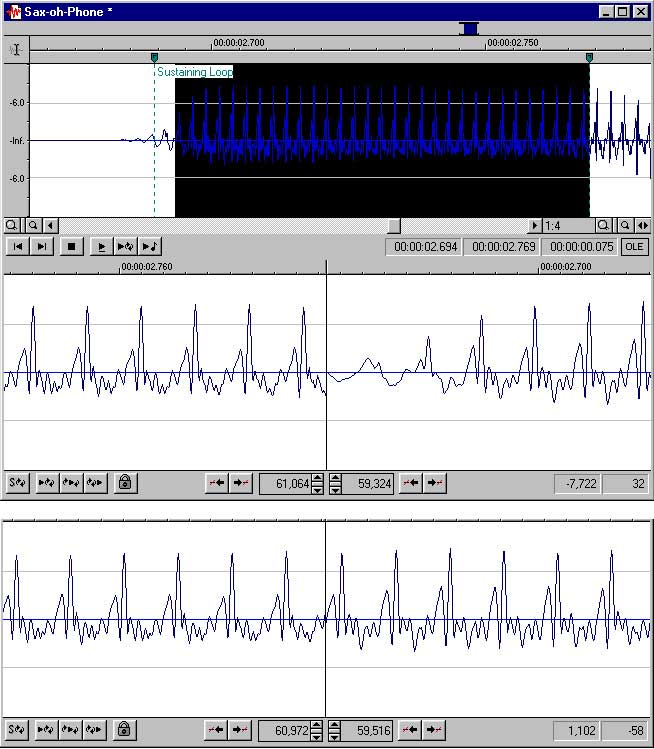
If you cut audio when the waveform is above or below the line the waveform will be at a certain level. If you butt this against another waveform or the start of the same waveform if you’re creating a loop, unless their levels match exactly you’ll hear a click or glitch. Many pieces of software have a Loop Tuner or a Loop Finder which butts the end of the sample up against its start so you can see and hear what it will be like when looped. These make loop creation so much easier.
Shape of fades to come
When making loops, it’s not always enough simply to cut at zero-crossing points. You should also look at the shape of the wave and try to pick points so that the join looks like a continuation of the waveform. So, for example, if the waveform leading to the zero-crossing point at the end of a loop sweeps up from below the line, look for the waveform in the next section to continue the curve above the line.
Also, for a seamless loop, the tone of the start and end should be similar. You won’t find it easy to fade the end of a piano sample into the start of a trumpet sample. Although, having said that, there are ways to do this…
Cut tips
If you have a stubborn sample or want to loop a sample with different start and end sounds, try this. Copy a section from the start of the sample and merge it with the end. Use your editor’s merge function or do it with a crossfade. This adds part of the tone from the start of the sample to the end which should make it easier to loop.
If you are creating your own samples for looping, here’s another tip. Instead of recording the sample once, record it twice in succession and create the loop using the second recording. This allows any frequencies at the end of the first sample – any reverb tails, for example – to be captured at the start of the second sample so its start and end will sound more alike. It’s a similar idea to the previous tip.
Creating fades and crossfades at both the recording and sample level requires a little application. It’s a creative part of audio editing and a technical understanding of the process will help you do a better job.
For more info…
Type “fades and crossfades” into your favourite search engine and you’ll find details of how to create and use them in a wide range of audio software.


